TagBot™ Basics for Template Users
As a template user, you want template management to be as fast and easy as possible. So we have tried to make the User areas simple and straightforward. To use the TagBot program to manage your templates, you will first need to have templates that have been provided with this program, or by a Designer for use with this Program.
Open a Template
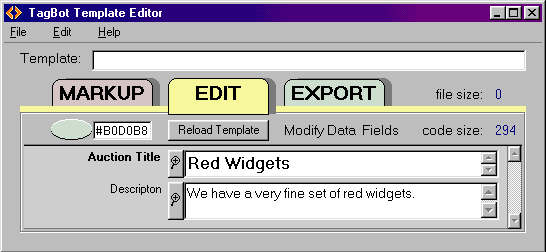
If your template does not automatically load when the program starts, then select a template from the File > Open menu. When you select a template from the list, it will automatically load. You will find it on the EDIT tab on the screen, which is where you will begin using the template. Large templates may take some time to load, so watch the counter roll over.

Ready to Enter Data
Once the template has been selected, click the EDIT tab to see the data fields. On the left of each field will be a short description of what is expected in the field, and many fields will contain suggested data that you can change. Just fill in each field with the information you would like to use. If you would like to abandon your changes or try again, you can click the "Reload Template" button to restore the EDIT screen to its startup values.
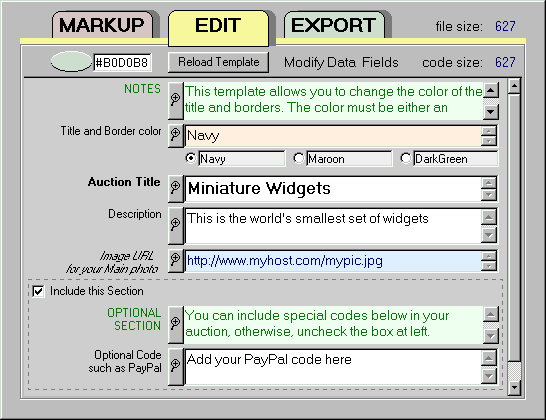
You may encounter fields that are various colors. The colors are to remind you that different types of data are required. For instance, a blue field expects a URL and an orange field expects a value like a color or size. If these special fields appear, the prompt on the left should help you decide what to enter, and the example in the colored field will help you decide what format to use for the data. Sometimes you will be given option buttons with choices.
You might also see a green field that contains notes. The notes will help explain what you should do with the template, so read the notes before continuing. Use the scrollers or magnifier button to blow up the field to see more.
Save New Default Answers
At some point you may want to change the default answers that appear every time the template loads in TagBot. While on the EDIT screen, you may use the File menu to "Save Edited Data Fields." You will be asked to select a new name for your template TPL file. Be sure that it is different from your original template so that you won't overwrite the original.
Your newly saved TagBot template will work just like the original, but will have your own data in the slots when it loads into TagBot. You can save as many different modified templates as you want for different themes, and can load those new templates instead of the original that you started with.
Color Browser
If your design allows you to enter your own colors instead of providing color options, you can use the color tool near the top of the EDIT window. Click the color swatch to open the popup color browser, select a color, click OK, and the color code will appear in the TagBot toolbar. You can copy it into the appropriate slot.
If you are not familiar with using a color browser, hold down your mouse button while gliding over the rainbow palette to find the color you want. Then use the up/down slider to select a daker or lighter shade. If your colors always come out black, remember to set that slider to a lighter shade.
Enlarge the screen
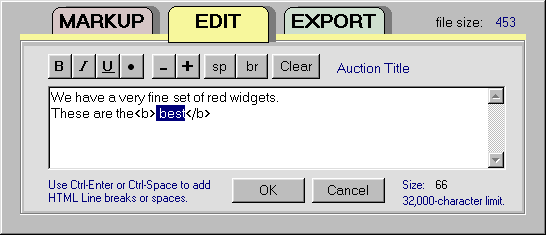
When viewing the default data fields presented on the EDIT screen, you can click the magnifier icon to see a full-screen view of the data. A few shortcut keys on the full-screen view provide some common HTML tags that one might use in a description or title - these are only available for fields that are displayed as text or titles. Simply highlight the text to tag and click a button to add the tag. We've added bold to the highlighted text in the example below, which inserted the <b> and </b> HTML tags. The Plus and Minus buttons will insert HTML codes to make the text Bigger or Smaller. The Clear-button will erase any of the tags that were inserted within the text that has been highlighted. It does not erase the text. Ctrl-keys can be used as shortcut tagging keys (see the edit menu) and Ctrl-Alt keys will undo the specified tag. Text editing is limited to 8000 characters per field.
(If you have received a more advanced template, clicking on the magnifier for an Included-File field will open a file management window instead of the full-screen view.)
Export the Code
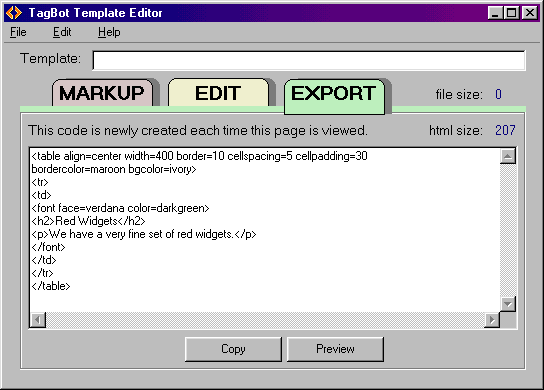
Preview your changes at any time by clicking on the EXPORT tab to view the HTML code. As a shortcut, you can double-click on the EXPORT tab to view the HTML and open the Browser simultaneously. Whenever you change from the EDIT screen to the EXPORT screen, the code will be freshly created, so don't make any interim edits to the HTML code on the Export Screen or you will lose them with each new export.
The COPY button at the bottom of the EXPORT page will copy the contents of the HTML code to the clipboard for pasting into your listing or auction management program. The Preview button will open your browser and display the results of your HTML code.
View the Results
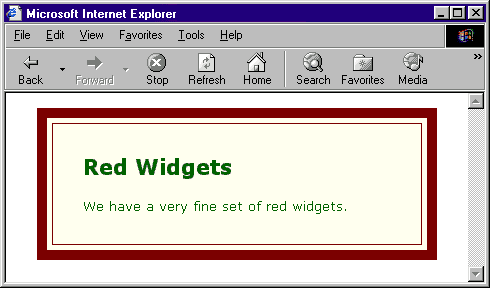
Preview as frequently as you like to verify your changes in the browser.
Save
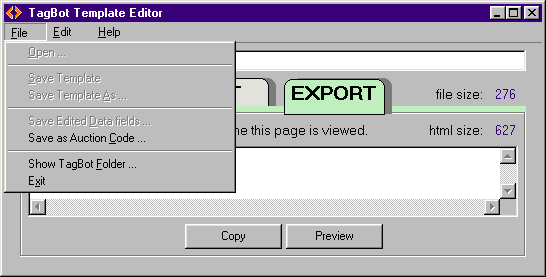
When you are happy with the results of your new page, You may save the HTML code from the main menu's "Save as Auction Code". Save the file as HTML format (the default choice) and it will be ready to use. Or you may save the file as a TXT file to make it easier to open in a text editor for pasting elsewhere.
After you have saved your HTML code, you can return to the EDIT screen and process another version to create another auction. This allows you to quickly create multiple auctions from the same template without interfering with the integrity of the template. Be sure to save each new auction as a new file name.
After just a few uses, we think you'll begin to appreciate the convenience of this type of template editing and auction creation. If you have specific questions about your template design or its use, please contact your template designer.
 TagBot™