Tips
- Highlight code:
Ctrl+A will highlight all the text in a code box or text box so that
you can easily copy, delete, or replace it.
You can triple-click to highlight an entire line of text in most browsers.
- Cursor Hidden?:
If you are editing and can't see your cursor on a dark background,
switch to a light background just for editing.
Then switch back to your darker background for previewing and saving.
- Bookmark your Settings:
After defining your colors at the top, section titles in the slots,
and buttons at the bottom, you can bookmark your settings for return visits.
Only slots are saved — nothing added to the code window is bookmarked.
Click the MAKE button and a bookmark link will appear below the code window.
Click the bookmark link and a new browser will open with your settings.
Manually bookmark that page and then close it to continue where you left off
on this page. You can make several different bookmarks with different colors
by giving each a different name in your browser's bookmark editor.
Additionally, if you are using Firefox, you may be able to save the text in
the terms boxes. Internet Explorer doesn't allow enough room to save all
that text but might save a partial of about 1200 characters of terms text.
Trial and error is your best guide — check the popup page to see what has transferred.
- Editing code:
After you have your basic template, text, and photos worked out,
and use the MAKE button, you can make minor modifications directly
to the code and use the bottom Preview button to display what you have in the code box.
However, if you click the MAKE button or use the top Preview button,
the code box will be rewritten and any editing there will be lost.
- Save code:
The SAVE button will save what is in the code window and download it to a file on your computer.
So if you make any hand edits in the code window, they would be saved as part of your file.
Formatting
-
To start a new paragraph, add <br><br> between your paragraphs.
-
To drop down to the next line, add only one <br> where you want the line to break.
-
To make a bullet list, copy the sample line below and change the text inside:
<li> text </li>
Repeat for each bulleted list item.
-
The following code wrappers can style your text with:
<b>bold</b>
<i>italic</i>
<u>underline</u>
<big>big text</big>
<small>small text</small>
<h3> Heading </h3>
Photobucket Settings
-
For best image results, your images should be 640x480 or 480x640 or 640x640.
Choose the 640x480 setting on Photobucket prior to uploading so that
images larger than this size will be reduced to fit into the template.
Smaller photos will work just fine, but won't fill all the space available in the gallery.
The screenshot below shows the basic uploader. Look for the "More Options" link on the bulk uploader.

-
If you choose to label your photos after you upload them to Photobucket,
you can use those labels as captions in your gallery.
Photobucket asks for labels during upload,
or you can label each photo afterwards by editing it's label in Photobucket's thumbnail view.
Click the option in the tool above to use Photobucket labels as captions in your gallery.
-
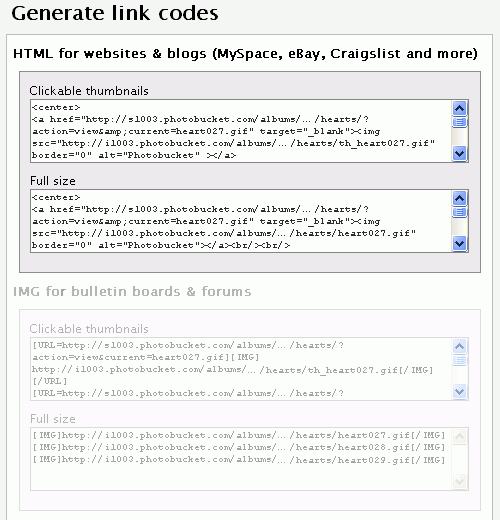
On your album page, checkmark all the photos you would like to use in one template gallery.
At the bottom of the page, click the option to "Generate Link Codes" and a new screen will appear.

In the new Photobucket screen, copy your thumbnail code from the top box and paste it into the photo section of the template
(or you can use code for full-size images from the second slot, since the program will generate thumbnail code from either source).
If you have to get photos from different pages or albums, it is perfectly OK to paste multiple sets of Photobucket codes into the template.
If you can't Generate the LINK codes, then pick up the code from each "HTML Thumb" slot in your album.
|
|


